Interior Door - Liteair 13 Round Top Single Steel Door
Interior Door - Liteair 13 Round Top Single Steel Door
Pre-Order Today (Build Time: 5 Months)
Questions? 1-888-581-8204 or email us for a quote.
Which Way Does It Swing?
- Single Doors -
From standing outside looking into the room.
 |
 |
 |
 |
- Double Doors -
From standing outside looking into the room.
 |
 |
 |
 |
Couldn't load pickup availability
Share this product
📐How to Measure Your Interior Door
Accurate measurements are crucial when ordering a new iron door to guarantee a flawless fit. Our step-by-step guide makes measuring easy, helping you avoid installation issues. Whether you're replacing an existing door or installing a new one, follow these simple instructions to ensure the perfect fit for your new pre-hung interior steel door.
Tools You’ll Need:
- Measuring tape (preferably metal for precision)
- Paper and pen or phone (to note measurements)
- Ladder (if measuring a tall opening)
- Level (to check alignment)
- A friend or two (for moral support and to blame if the measurements are off!) 😆
All interior doors from IronDoor.com come with a Pre-Welded Jamb ready for installation. No jamb assembly is required on-site, ensuring a precise fit and greater structural integrity.
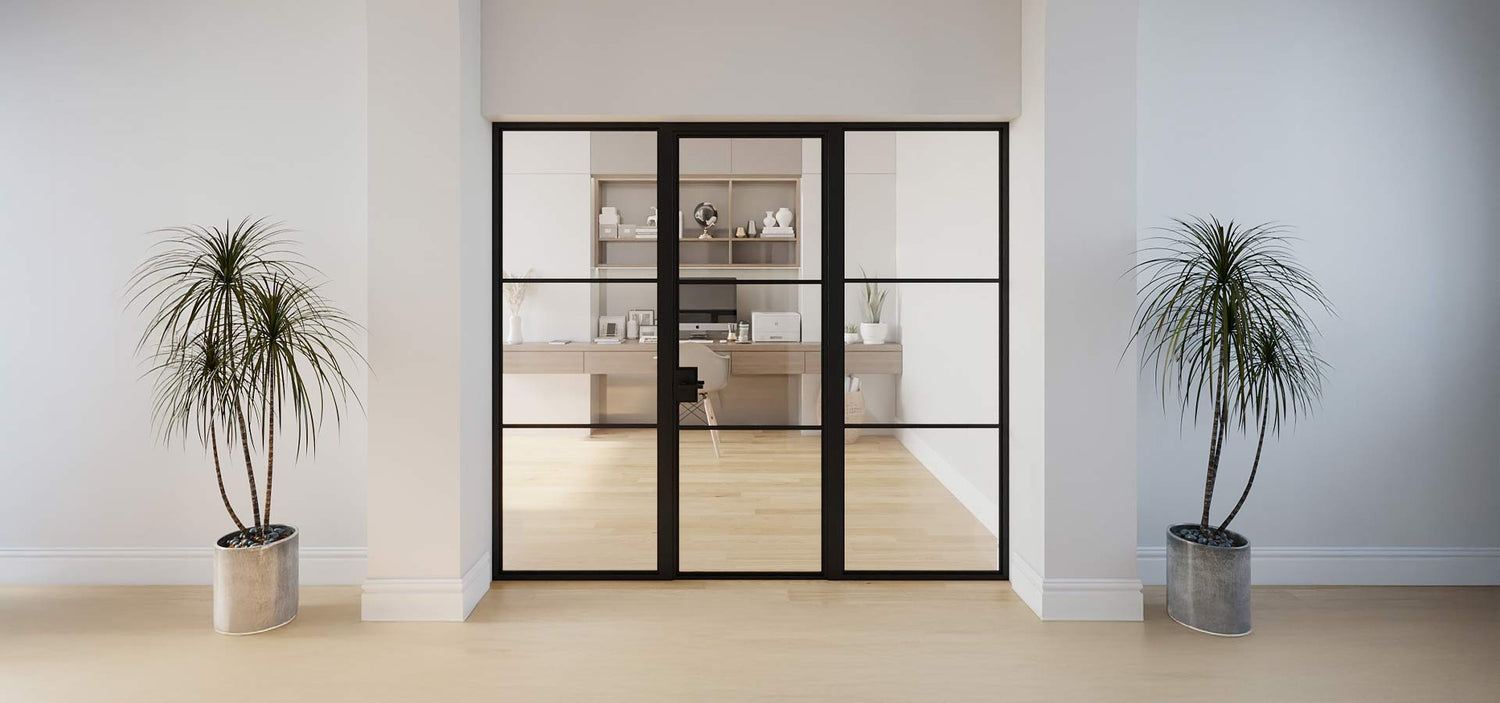
* The door featured here is an 72" x 96" Openair 23 Black French Steel Interior Door.

The recommended rough opening for this interior door is 72.5" x 96.25", allowing space for adjustments to ensure a precise fit. You typically want to make sure your rough opening is 1/4" taller and 1/2" wider than the interior door.
Note: The clearance spacing under the door is 5mm.
Conclusion
Properly measuring your door ensures a perfect fit and smoother installation. If you’re unsure about your measurements, consider hiring a professional. Steel doors are heavy and require precision, so it’s essential to get it right the first time!
🛠️ Interior Door Installation Guide
IronDoor.com interior series include the following pre-installed accessories, ensuring a smooth and hassle-free installation:
- Tempered Glass (Operable if applicable)
- Steel Hinges
- Stylish Matching Handle
- T-Astragal (for wine cellar doors)
- Reinforced Heavy-Duty SteelLock Anchors
- Weather Stripping
- 2" Steel Jamb
This ensures a hassle-free setup, making the install easier for your installer.
Let's Get Started!
⏳ Time Required: Installation typically takes 2-3 hours. We highly recommend hiring a professional installer with experience in iron doors for the best results. However, some of our customers successfully install their doors on their own.
⚠️ Note: If using a razor knife, be extra careful to avoid accidentally cutting into the door or jamb.

Step 1: Move the Crate to the Setup Location
Our doors are extremely durable and heavy, so for a safe and smooth installation, we recommend:
- Single Door: 2 people for handling
-
Double Door: 3 people for handling
- Pivot Door: 4 people for handling
Take your time and lift carefully to avoid injury!
Step 2: Check Rough-Opening Measurements
Before unboxing the door crate, measure your rough opening to ensure it is:
- .5" wider than your new interior door
- At least 0.25" taller than your new interior door
📄 You can find your door size on your receipt. Double-checking these measurements ensures a perfect fit!
Step 3: Inspect & Unbox Door
- Inspect the crate for any damage. If you notice any issues, take photos 📸 before unboxing.
- Unbox the door and jamb with the glass side facing up 🪟. The CAD drawing will be on the same side as the glass.
- Check for any damage once it's unboxed.
🚨 If you notice any damage:
📷 Take photos immediately and submit them within 24 hours for warranty coverage.
If the crate was damaged during shipping and caused damage to the door, it may be covered by the shipper's insurance.
Step 5: Remove Door from Jamb
Remove the door panel from the jamb and center the jamb in the opening while making sure the sides also stay level. If necessary, remove any drywall to ensure a direct and secure connection to the framing stud. Use composite shims if needed for leveling.
⚠️ Note: Make sure the jamb is 100% level on all sides to ensure proper fit and functionality.
Step 6: Secure Jamb with Screws
Once the jamb is completely level and room for adjustment on the sides, secure it to the framing by bolting the top installation tab directly to the top header. It's best to leave the side bolts lose until after the door panels are installed to allow movement to align door panels perfectly.
Step 7: Install Door Panels
Before installing the door panels on the hinges first make sure the washer is placed down.
- If installing a double door install the nonactive door first.
Install the door panel while it is open at a 90-degree angle from the closed position. With the help of 2-3 people and a pry bar to lift from the bottom, carefully lift the door and slowly lower it onto the hinges once properly aligned.
Close the door and lock into place with flushbolt for double or lever lock for single. Make sure everything feels and operates smooth. If the door doesn't shut properly check if it's level and properly aligned.
🔄 Repeat step 7 if installing a double door.
Once the door(s) open and close smoothly, and the gaps are even from top to bottom, secure the jamb by tightening the side installation screws and double check closure.
Step 9: Install Handles
You're Almost There! 🎉
For a seamless and hassle-free installation, the only step left is attaching the handle.
Easy Handle Installation:
- Use an Allen wrench to separate the handles.
- Align the mounting screw with the pre-drilled holes in the door panel.
- Secure the handle by tightening the Allen bolt on the side.
Step 10: Clean & Enjoy
Gently clean the door using a mixture of mild dish soap and water. Use a soft microfiber cloth to wipe down the surface, ensuring a streak-free and scratch-free finish.
Enjoy your new steel interior door, designed for both beauty and security! 🚪✨
🌟 Our iron doors resist warping, rotting, and forced entry—something wood doors can’t promise. Get peace of mind with a door that’s as strong as it is beautiful.
Custom Order
Interior Specifications
Make a Lasting First Impression!
Elevate Your Home with Stunning, Handcrafted Iron Doors Designed for Unmatched Security, Lasting Durability, and Timeless Elegance.

Heavy-Duty Steel Hinges
Our Heavy-Duty Steel Hinges are engineered for superior durability, smooth operation, and long-lasting performance.
- High-Strength Steel Construction – Built to withstand heavy loads without warping or bending.
- Smooth & Quiet Operation – Precision-engineered for effortless door movement.

Locking Privacy Handle
Our custom-designed interior lever handle is meticulously crafted to enhance both the strength and elegance of your door, providing security you can trust.
- Precision Engineered – Designed for a seamless fit, ensuring smooth operation and reliability.
- Premium Durability – Made from high-quality metals for long-lasting strength and resistance to wear.
- Standard Size - Can be easily replaced using a handle of your choice.
- Backset: 2.75"

SteelLock Install Anchors
SteelLock Install Anchors are designed for fast, reliable, and ultra-secure installation of steel doors. Engineered for maximum grip and durability, these anchors ensure a tight, long-lasting hold, making them ideal for both residential and commercial applications.
- Heavy-Duty Strength – Built to securely fasten steel doors with superior hold.
- Quick & Easy Installation – Designed for effortless setup, saving time and effort.
- Trusted Performance – Engineered for professionals and homeowners alike.

Tempered Extra Low Iron Glass
Our single pane tempered Extra Low Iron Glass is designed for unparalleled transparency, superior durability, and enhanced safety.
- Ultra-Clear Transparency – Extra low iron composition removes the greenish hue for crystal-clear views.
- Tempered for Strength & Safety – Reinforced for durability, shattering into small, blunt pieces for added protection.
- 5x Stronger than Regular Glass – Withstands impacts, thermal stress, and environmental changes.
- Interior doors typically feature a single pane of glass for a sleek and elegant look, while dual-pane glass is used for wine cellars to provide enhanced insulation and climate control.
How To Measure Interior
Accurate measurements are crucial when ordering a new iron door to guarantee a flawless fit. Our step-by-step guide makes measuring easy, helping you avoid installation issues. Whether you're replacing an existing door or installing a new one, follow these simple instructions to ensure the perfect fit for your new pre-hung interior steel door.
Tools You’ll Need:
- Measuring tape (preferably metal for precision)
- Paper and pen or phone (to note measurements)
- Ladder (if measuring a tall opening)
- Level (to check alignment)
- A friend or two (for moral support and to blame if the measurements are off!) 😆
All interior doors from IronDoor.com come with a Pre-Welded Jamb ready for installation. No jamb assembly is required on-site, ensuring a precise fit and greater structural integrity.
* The door featured here is an 72" x 96" Openair 23 Black French Steel Interior Door.
The recommended rough opening for this interior door is 72.5" x 96.25", allowing space for adjustments to ensure a precise fit. You typically want to make sure your rough opening is 1/4" taller and 1/2" wider than the interior door.
Note: The clearance spacing under the door is 5mm.
Conclusion
Properly measuring your door ensures a perfect fit and smoother installation. If you’re unsure about your measurements, consider hiring a professional. Steel doors are heavy and require precision, so it’s essential to get it right the first time!