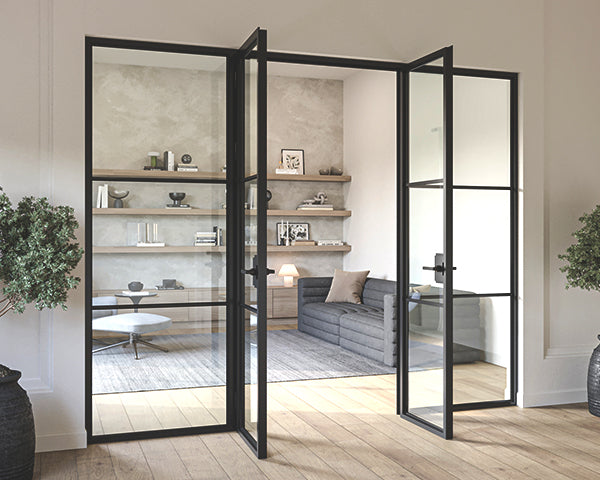
🛠️ Exterior Door Installation Guide

IronDoor.com doors include the following pre-installed accessories, ensuring a smooth and hassle-free installation:
- Tempered Glass (Operable if applicable)
- Bullet Hinges
- Steel Jamb welded to Threshold
- Operable Glass Hardware (if applicable)
- Roller Catches
- Stylish Matching Deadbolt (for a Perfect Finish)
- T-Astragal (for double doors)
- Reinforced Heavy-Duty Mounting Tabs
- Weather Stripping
- Door Sweep
- Handles (not pre-installed)
This ensures a hassle-free setup, making the install easier for your installer.
Let's Get Started!
⏳ Time Required: Installation typically takes 2-3 hours. We highly recommend hiring a professional installer with experience in iron doors for the best results. However, some of our customers successfully install their doors on their own.
⚠️ Note: If using a razor knife, be extra careful to avoid accidentally cutting into the door or jamb.

Step 1: Move the Crate to the Setup Location
Our iron doors are extremely durable and heavy, so for a safe and smooth installation, we recommend:
- Single Door: 2-3 people for handling
-
Double Door: 3-4 people for handling
- Pivot Door: 4-5 people for handling
Take your time and lift carefully to avoid injury!
Step 2: Check Rough-Opening Measurements
This should have been done during the ordering process, but before unboxing the door crate, measure your rough opening to double check it is:
- 1" wider than your new door size
- At least 0.5" taller than your new door size
📄 You can find your door size on your receipt. Double-checking these measurements ensures a perfect fit!
Step 3: Inspect & Unbox Door Panels
- Inspect the crate for any damage. If you notice any issues, take photos 📸 before unboxing.
- Unbox the door panels with the glass side facing up 🪟. The CAD drawing will be on the same side as the glass.
- Check the door panel for any damage once it's unboxed.
🛠️ Handling Operable Glass
- If your door has operable glass, you can remove the glass panel before installation to prevent damage and make the door lighter. (optional)
- Open the glass panel to a 90-degree angle, then slide the glass panel towards the top of the door to remove it.
- Protect the glass and place it in a safe location.
🚨 If you notice any damage:
📷 Take photos immediately and submit them within 24 hours for warranty coverage.
If the crate was damaged during shipping and caused damage to the door, it will be covered by IronDoor.com guarantee.
Step 4: Inspect & Unwrap Jamb
The jamb is the frame of the door and will come wrapped in bubble wrap and cardboard. Carefully open and inspect for damage. If any damage submit it to us within 24 hours.
Step 5: Install Jamb In Rough Opening
Center the jamb in the opening and level the threshold while making sure the sides also stay level. If necessary, remove any drywall to ensure a direct and secure connection to the framing stud. Use composite shims if needed for leveling.
Secure the jamb in the rough opening using one top corner side install tab with one bolt. Once you have one bolt holding the jamb level and square the jamb
Step 6: Install Door Panels
Before placing the door slabs on the hinges first put one ball bearing in each hinge. The ball bearings come in the handle box.
- If installing a double door install the non-active door first.
- If you have operable glass panels it's best to remove the glass before installation.
Install the door panel while it is open at a 90-degree angle from the closed position. With the help of 2-3 people and a pry bar to lift from the bottom (be careful not to damage sweep), carefully lift the door and slowly lower it onto the hinges once properly aligned.
Close the door and lock into place using the top and bottom flush bolts for double doors or the deadbolt for single doors. Make sure everything feels and operates smooth. If the door doesn't shut properly check if it's level and properly aligned.
🔄 Repeat step 6 if installing a double door.
Once the door(s) open and close smoothly, and the gaps are even from top to bottom, secure the jamb by tightening the side installation bolts.
If applicable, you can now reinsert the glass into the operable panels.
⚠️ Note: Make sure the jamb is 100% level on all sides to ensure proper fit and functionality. Starting with the jamb level and square is just the beginning. Subsequent adjustments are common with iron doors, which may sometimes need slight deviations from level, plumb, and square conditions to fit properly.
Step 7: Secure Jamb with Bolts
Once the jamb is completely level and room for adjustment on the sides, secure it to the framing by bolting the side installation tabs directly to the studs.
Do not use the top install tab, it's only used for production. If you bolt the top install tab over the years as the house settles it can put pressure on the top of the door and cause issues.
Step 8: Roller Catch Adjustment
Each door panel is equipped with two adjustable roller catches, located at the top and bottom. You can fine-tune these using a Phillips screwdriver to achieve your desired level of closure for a secure and smooth fit.
Step 9: Install Handles
You're Almost There! 🎉
For a seamless and hassle-free installation, the deadbolt comes pre-installed, so the only step left is attaching the handle.
Easy Handle Installation:
- Use an Allen wrench to separate the handles.
- Align the mounting screw with the pre-drilled holes in the door panel.
- Secure the handle by tightening the Allen bolt on the side.
Step 10: Clean & Enjoy
Gently clean the door using a ammonia-free glass cleaner. Use a soft microfiber cloth to wipe down the surface, ensuring a streak-free beautiful finish.
Enjoy your new iron door, designed for both beauty and security! 🚪✨
📷 Please send use photos of your new door installed.
Shop IronDoor.com
IronDoor.com is your premier source for high-quality iron doors, offering a wide range of styles from traditional to contemporary, crafted with classic techniques and modern technology.